



How to Sign Up for Meta Muse and Use a Referral Code
Muse has recently become one of the most talked-about AI Agent products in the AI tools space. As a new AI Agent from …
How to change your IP address on Android using a proxy? This article explains what a proxy IP does and how it works, identifies which IP address changes when using a proxy, and covers three ways to set up a proxy on Android: built-in Android settings, third-party proxy apps, and cloud phones. It also explains how to check whether your IP address has changed successfully.

Get an AI-Powered Summary of This Article
Using a proxy on an Android phone is a common way to change the public IP address that websites and online services see. For users who need to access content from specific regions, test applications under different network environments, or connect to the internet through different proxy IPs, knowing how to configure a proxy on Android can be useful.
This guide explains whether using a proxy changes your IP address on Android and covers three ways to configure one: Android's built-in settings, third-party proxy apps, and cloud phones. It also explains how to check whether your IP address has changed successfully.
The most direct function of a proxy IP is to change the public IP address that websites and online services see. For example, when your phone accesses a website through its normal network connection, the website sees the public IP associated with that network. After you configure a proxy, network requests are first sent to the proxy server, which then accesses the target website. The website sees the IP address provided by the proxy server instead.
A proxy can be understood as an intermediary between your Android phone and the target website.
Android Phone → Proxy Server → Target Website or App
When your phone sends a network request, the request first goes to the proxy server. The proxy server then uses its own IP address to access the target website. As a result, the target website no longer sees the original public IP used by your phone. Instead, it sees the IP address of the proxy server.
Therefore, when you change your proxy IP, the public IP visible to websites and online services also changes. If you use a proxy from another country or region, the location associated with the IP may change as well.
A proxy changes the public IP address visible to external websites and services. The private IP address your phone uses within the current Wi-Fi or local network generally does not change when you configure a proxy.
In other words, using a proxy changes the public IP address seen when accessing the internet. Your original public IP is not directly rewritten into another IP. Instead, your network requests are routed through the proxy server, so the target website sees the new public IP provided by the proxy.
There are three common ways to set up a proxy on Android: using the built-in Wi-Fi proxy settings, using a third-party proxy app to route network traffic, or configuring a proxy on a cloud phone. The main differences are the scope of the proxy and the use cases each method supports.
Android provides built-in support for configuring a proxy for Wi-Fi networks. You do not need to install an additional app. Simply open the settings for the Wi-Fi network you are currently connected to and enter the proxy server information.
Typically, open Wi-Fi Settings, select the connected network, and open the network details or advanced settings. Find the proxy option, select manual configuration, and enter the proxy host and port provided by your proxy provider.
This method is relatively simple and works well when you only need to configure a proxy for the current Wi-Fi network. Keep in mind that these proxy settings are usually associated with a specific Wi-Fi network, so you may need to configure them again when switching to another network.
If Android's built-in proxy settings do not meet your needs, you can use a third-party proxy app. These apps can establish a proxy connection on the phone and route network traffic through the proxy server configured in the app.
After configuring the proxy, open a browser and visit an IP lookup website to check whether your public IP address has changed to the proxy IP. If you need to switch proxies, you can select another saved proxy configuration in the app and reconnect.
Compared with the built-in settings, third-party proxy apps usually provide more flexible proxy management. For example, you can save multiple proxy configurations and switch between them quickly. Some apps also support global proxy settings or allow you to specify which apps should use the proxy.
If you only need to change the public IP address of a single Android phone, the built-in settings or a third-party proxy app may be enough. However, when you need to run multiple Android environments at the same time, the challenge is no longer just how to configure a proxy. You also need a practical way to manage different devices, accounts, and network environments separately.
A cloud phone allows you to create multiple independent Android environments in the cloud. Each environment can have its own apps, accounts, and proxy IP. Compared with maintaining multiple physical phones, a cloud phone does not require you to manage a large amount of hardware and makes it easier to adjust device and network configurations for different use cases.
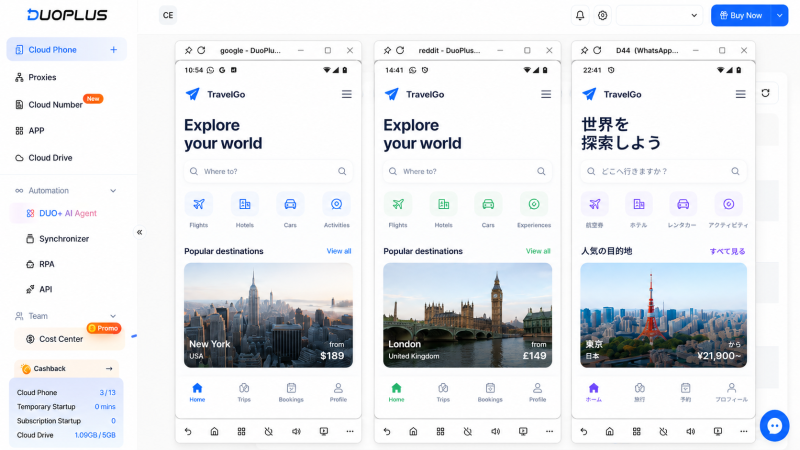
For example, DuoPlus Cloud Phone supports creating and managing multiple cloud phones and configuring a separate proxy IP for each one. You can assign different proxies based on your account or business requirements and manage them through a centralized console.
Android's built-in settings, third-party proxy apps, and cloud phones can all be used to configure a proxy, but they solve different problems. You can choose an option based on the number of devices, proxy management requirements, and your specific use case.
| Configuration Method | Number of Devices | Proxy Management | Best For |
|---|---|---|---|
| Android Built-in Settings | One or a few physical phones | Manual configuration for the current network | Temporarily changing the public IP on one phone and simple proxy access |
| Third-Party Proxy App | One or a few physical phones | Save and switch between multiple proxies; some support traffic rules | Frequently switching proxies or using different proxy configurations |
| Cloud Phone | Multiple Android environments | Centrally manage multiple cloud phones and configure proxies separately | Managing multiple accounts, app environments, and devices remotely |
If you manage multiple TikTok, Instagram, or other social media accounts and need to keep their accounts, devices, and proxies separate, DuoPlus Cloud Phone allows you to configure the corresponding proxy for each cloud phone environment.
After configuring a proxy, do not rely only on the proxy connection status shown on your phone. You should also check whether your public IP address has actually changed. The simplest method is to use a browser to visit an IP lookup website and compare the IP address and location before and after configuring the proxy.
Before configuring the proxy, use your Android phone's browser to visit an IP lookup website and record the current public IP address and location.
This gives you a reference for comparison. You need to know the original public IP address before you can determine whether it has actually changed after configuring the proxy.
After completing the proxy configuration, open the IP lookup website again and check the current public IP address.
If the IP address is different from the one shown before configuring the proxy, your internet traffic is using a different public IP. If the IP address has not changed, check the proxy host, port, username, password, and connection status.
In addition to checking the IP address itself, check the country or region associated with the IP.
For example, if you configure a US proxy and the IP lookup result shows the United States, you can initially confirm that the proxy location is working as expected. If the result still shows your original country or region, you may need to check the proxy configuration or the proxy service itself.
A changed IP address in your browser does not necessarily mean that every app on your Android phone is using the same proxy rules.
If you are using a third-party proxy app, check whether its proxy rules cover the target app. After configuring the rules, open the app you actually want to use and test the connection. You can then check the IP address again if necessary.
When using a proxy on Android, the IP address that usually changes is the public IP address visible to websites and online services, not the private IP address your phone uses on the local network.
There are three main ways to configure a proxy. Android's built-in settings are suitable for simple single-device proxy needs, third-party proxy apps are useful for managing and switching between multiple proxies, and cloud phones are better suited to running and managing multiple independent Android environments. If you need to manage multiple Android environments and proxy configurations over time, using a cloud phone to centrally manage different devices and proxies can be more efficient than repeatedly switching between physical phones.
It depends on the proxy tool you use. Some third-party proxy apps support per-app proxy settings, allowing you to specify which apps use the proxy while other apps continue using the original network connection.
Usually, no. A proxy mainly affects the public IP address that external websites and online services see. The private IP address your phone uses on the current Wi-Fi network generally does not change when you configure a proxy.
The proxy host, port, or authentication details may be incorrect. The proxy connection may also have failed, or the target app may not be routing its traffic through the configured proxy. You can first check the public IP address in a browser and then verify the proxy configuration step by step.
Yes. You can configure proxy IPs separately based on your requirements. For example, different cloud phones can use proxies from different countries or regions, allowing you to manage different Android app environments and network configurations separately.
Muse has recently become one of the most talked-about AI Agent products in the AI tools space. As a new AI Agent from …

OpenAI Codex is an AI coding agent designed to help developers write, modify, review, and deliver code. It is available …

VK (VKontakte) is one of the major social media platforms in Russia. In addition to account management, content …
No need to purchase multiple real phones.
With DuoPlus, one person can operate numerous cloud phones and social media accounts from a single computer, driving traffic and boosting sales for you.